Monday, November 12, 2012

Hiking Joshua Tree National Park - Ryan Mountain Trail

You could spend days wandering around Joshua Tree National Park, but if you only have one I suggest you hike Ryan Mountain. This 3-mile out-and-back hike is a bit strenuous, but not overly so. Today I saw everyone from kids to retired folks and everyone in between enjoying the Ryan Mountain Trail. And let me tell you, the payoff for reaching Ryan's summit - the second highest in the park - is extreme.

Ryan Mountain in the distance, Joshua Tree National Park
Ryan Mountain's central location and 5,461-foot summit make it a perfect vantage point for appreciating Joshua Tree National Park's surrounding features, such as the valleys of Lost Horse, Queen and Pleasant, as well as the southern portion of the Wonderland of Rocks.

You can reach the trail head from any of the park's entrances, but I recommend you come in through the west entrance, where you immediately encounter grove upon grove of the park's namesake - the Joshua Tree. Take a quick detour down Key's View Road to get a grand view of the Coachella Valley and desert cities below. Then on your return to Park Boulevard you will see Ryan Mountain rising up to the east.

On the ascent: Ryan Mountain, Joshua Tree National Park
Turn right to get back on Park Boulevard, and just after passing the Ryan Campground on your right and the Hall of Horrors on your left, you will see the large parking area for the Ryan Mountain Trail. There are restrooms here, but no water, so make sure you bring plenty of your own.

The trail is simple to follow. It first rises up a steep hill and after less than a mile you are treated to westward views over a deep canyon and incredible rock formations. Look closely and you may see rock climbers here. Look to the north and you will see the Hall of Horrors rocks in the valley below - pay attention to how big they look on the way in and how small they look from here. Then notice the incredible rock formations of the Wonderland of Rocks that extend toward the northern horizon.
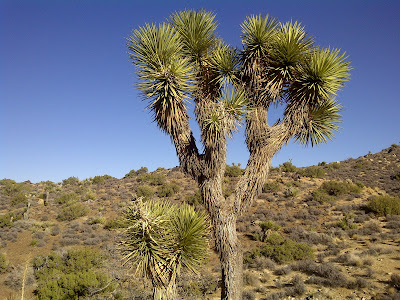
Joshua Tree on Ryan Mountain
With views in every direction, you won't know which way to look as you continue up the trail. But keep a close eye on the trail. This is a heavily trafficked trail and can be a bit rough in patches. Be careful. Don't let a careless misstep ruin your day at Joshua Tree.

As you make your way to the summit, you will notice that the trail continues on past where you thought the summit would be. Don't worry, the trail gets more gentle the closer you get to the top. And when you arrive, you will be glad you made the effort.

Wonderland of Rocks in the distance, facing north on Ryan Mountain
If you go up and turn right back around you can probably do this hike in less than two hours. Take some time, though, and appreciate the 360-degree views. Take your map up to the summit with you so you can really absorb where you are. Joshua Tree National Park is a place you will want to linger.

Joshua Tree on the eastern slope of Ryan Mountain
Here are the quick stats for the Ryan Mountain Trail:

Trailhead: The trail head is not shown on the map you are given for free at any of the three Joshua Tree National Park Visitor's Centers; Nonetheless, it is easy to find. Just take Park Boulevard and you will find it on the south side of the road just east of the Ryan Campground (which is on the map).
Distance: 3-mile out-and-back
Elevation Gain/Loss: 1,000 feet (304 m)
Map: You will find a map for the Ryan Mountain Trail here.
Hiking Time: About 2 hours, depending on your personal speed.
Best Times to Hike: This hike is great year-round. Fall through spring, make sure you layer as the temperature at the summit is typically colder than at the trailhead.
Difficulty: Moderate

View of Mount San Gorgonio from Ryan Mountain summit
For more information on this hike or other hikes discussed in the blog HikeyHikey, feel free to leave a comment below. Check out my other blogs Man of Merit andMyFitLife2Day. Or contact me via my splash page at about.me/brian.schwarz.

Happy hiking!


Saturday, November 10, 2012

Hiking East Kansas - Clinton Lake George Latham Trail

Opportunities for hiking are everywhere - you just have to look for them. On a recent cross-country road trip from New England to New Mexico with my partner and our two dogs, we were looking for a place to get out and stretch our legs after crossing the state line into eastern Kansas. A quick Google search landed us on the Kansas Trails Council website where we found directions to the Clinton Lake George Latham Trail, located just west of Lawrence, home of the University of Kansas. (Go Jayhawks!)

Tee-pee setup near the George Latham Trailhead, Woodridge Park, KS
Man-made Clinton Lake is home Woodridge Park, where the George Latham Trail winds through forest and pastures on a 4.5-mile loop. It took about 20 minutes to reach the trailhead from the exit on I-70, and after the 2.5-hour hike we were able to enjoy a nice healthy meal in nearby Lawrence before getting back on the road.

Hiking the George Latham Trail (with Diego) near Lawrence, KS
The best part of the Clinton Lake George Latham Trail is that no-fee primitive camping is allowed. Next time we pass through Kansas we'll be prepared to save some money and enjoy a night under the stars.

Here are the quick stats for the Clinton Lake George Latham Trail:

Trailhead: From I-70, take KS-10 exit and go south U.S. 40 (W. 6th St.) and turn right (west). Go about 4.5 miles and turn left on Co. Rd. 1023. Go another 3.5 miles or so to reach N. 1250 Rd. and turn left. Go a mile to reach E. 350 Rd., which will take you half a mile to the Woodridge Park parking lot. Enter the park on foot (if the gate is closed). Start the trail at the trailhead on the north side of the open field.
Distance: 4.5-mile loop
Elevation Gain/Loss: Insignificant
Map: A map of the George Latham Trail is available from the Kansas Trails Council.
Hiking Time: About 2.5 hours, depending on your personal speed.
Best Times to Hike: This hike is great year-round.
Difficulty: Easy

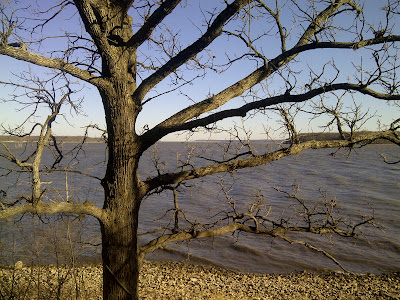
View of Clinton Lake from the George Latham Trail in eastern Kansas
For more information on this hike or other hikes discussed in the blog HikeyHikey, feel free to leave a comment below. Check out my other blogs Man of Merit andMyFitLife2Day. Or contact me via my splash page at about.me/brian.schwarz.

Thursday, November 8, 2012

Hiking Greater St. Louis - Lewis and Clark Trails Loop

Hikers typically don't think of the Midwest when considering a hiking destination, but if you ever find yourself in St. Louis, for business or even just passing through on your next cross-country road trip, you would be remiss not to seek out some hiking along the Missouri River bluffs.

Missouri River bluffs sunset hiking, Weldon Spring Conservation Area
The Weldon Spring Conservation area in Saint Charles County, just off I-64 west of St. Louis, is home to several trails that fit the bill for an amazing day in the woods. This post describes a 5-mile loop of the Louis and Clark Trails that can be done in just a few hours - even as a several-hour stop-off on your next cross-country road trip.

From I-64, take the Weldon Spring exit and go south on route 94. Pick up a map at the conservation area headquarters (or take along a printed copy of the one available in the quick stats section below), and park in the the parking area on the left side of the road just past the Francis Howell High School.

Descending to Missouri River bluffs, Lewis and Clark Hiking Trails
Take the trail that heads southeast down a fire road directly toward the Missouri River, and in less than a mile you will take a right at the Y and find yourself descending down a scenic single-track trail that leads to a lookout point on the Missouri River bluffs. There's a huge boulder here you'll probably want to stop at to take pictures and linger, but there are more vistas coming, so pace yourself.

Missouri Conservation Department maintains Lewis and Clark Hiking Trails
The trail turns northeast here and winds down into and follows the wall of a gully leading back around to another incredible vista along the bluffs. After this vista the trail descends rapidly to a creek with a fairly wide creek bed - be careful here for seasonal flooding.

This convenient hike off of I-64 west of St. Louis is about pay off!
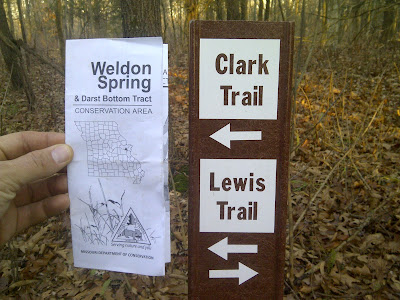
At the creek, which is at approximately the 2.5-mile point, the Lewis and Clark Trails split and you will have a choice to continue on the Lewis Trail, which leads back toward the river for an 8-mile loop option, or follow the Clark Trail for the 5-mile option. The Clark Trail leads up the creek bed. This part of the trail is a bit less scenic, but it is still a wonderful walk in the woods. Eventually the trails will reconnect, and you will turn left at the junction to continue back to the parking lot where you started.

Signage can seem confusing, but get the map and you'll figure it out!
Here are the quick stats for the Weldon Spring Conservation Area Lewis and Clark Trails Loop:

Trailhead: From I-64, take the Weldon Spring exit and go south on route 94. Park in the parking area on the left side of the road just past the Francis Howell High School.
Distance: 5-mile loop with 8-mile option
Elevation Gain/Loss: 860 ft (262 m) approximate
Map: A map of the Weldon Spring Conservation Area is available from the Missouri Department of Conservation.
Hiking Time: About 2.5 to 3 hours for the 5-mile loop, depending on your personal speed.
Best Times to Hike: This hike is great year-round, but summers can be incredibly hot. Also, be careful to avoid seasonal flooding.
Difficulty: Easy to Moderate

For more information on this hike or other hikes discussed in the blog HikeyHikey, feel free to leave a comment below. Check out my other blogs Man of Merit and MyFitLife2Day. Or contact me via my splash page at about.me/brian.schwarz.

Happy hiking!

Thursday, November 1, 2012

Hiking Rancho Mirage - Survivors Loop Foothills Hike

Every town should be so fortunate as Rancho Mirage. In this age when communities are on the front lines of the obesity epidemic, Rancho Mirage is truly blessed to be home to fitness hiking trails with such variety as these.

The Survivors Loop hike begins at Rancho Mirage Cancer Survivors Park
The Rancho Mirage trailhead practically starts at a bus stop next to city hall, at State Highway 111 and Frank Sinatra Drive, where there's a park honoring cancer survivors. From here, trails go up and down along the foothills, snaking through canyons and passing unrivaled views of the northern Coachella Valley and surrounding mountain ranges before heading back to the beginning at a soon-to-open 5-star resort - the much anticipated Ritz Carlton Rancho Mirage.

Rancho Mirage Cancer Survivors Park, seen from the Jack Rabbit Trail
The hike I describe here is actually a composite of several trails: the Jack Rabbit, Road Runner and Chuckwalla trails to be exact. From the parking area, go through Cancer Survivors Park and take the Jack Rabbit trail up the back side of the hill you see on your right. You will go up several switchbacks and pass the Bighorn Overlook before finally reaching Frank Sinatra Road at about 1.2 miles. Cross the road and take the Road Runner trail up the hill. Soon it will turn into the Chuckwalla Trail as it bends around and passes over two developer-flattened hill.

At the top, you will see a trail spur to your right. Take this first of two short spurs on this hike for an incredible view, then return to the original trail and go straight on and into a canyon. There will be a trailer park deep in the canyon below and to your right, and then you will notice another trail spur. Take this one to the end, to what I call Survivors Point, which looms above the intersection of Highway 111 and Date Palm Drive and overlooks Cathedral Canyon and downtown Cathedral City. Go back to the original trail and continue on.

View of Santa Rosa Mountains from first spur on the Survivors Loop hike
This part of the Chuckwalla Trail winds in and out of small canyons and passes below the Mirada Villas housing development before eventually ending up at an area cleared for the Ritz Carlton Development at Frank Sinatra Drive again. From here, walk carefully down Frank Sinatra until you arrive to the point where you crossed the road down earlier, and take the Jack Rabbit trail once again to the bottom of the hill at Cancer Survivors Park. You could also choose to re-trace your steps back along the Chuckwalla Trail, excluding the spurs, to add another 1.25 miles.

At the first spur junction, this arrow directs your way to the canyons
I am inspired to call this hike the Survivors Loop, and here's why: 1) When I hike here I do it in honor of all of the people in my life who have survived or are currently fighting to survive cancer, 2) Because I myself am a survivor of super obesity, and hiking these trails has allowed my fitness and weight-loss goals to survive while visiting the area, and 3) The trails here are old and exist in a constant state of jeopardy, surviving only because developers consider them a value-added selling point.

The Ritz Carlton Rancho Mirage is itself a survivor, adding perhaps a fourth reason for the name Survivors Loop. The property was almost fully completed when the collapse of Lehman Brothers in 2008 left its developers bankrupt. The resort has stood silent in these hills since then, but recently the City of Rancho Mirage struck a deal with a new developer that promises to put the project back on track. Apparently, The Ritz Carlton Rancho Mirage will survive and open sometime in 2013.

Going back the way you came provides many views you may have missed
If you're interested in hiking the Rancho Mirage trails, here are some quick stats for the Survivors Loop hike:

Trailhead: You can find parking in a small lot between Rancho Mirage City Hall and the Cancer Survivors Park just off State Highway 111. Additional parking can be found in the city hall lot at the corner of Highway 11 and Frank Sinatra Drive. You can also shorten this loop by driving up Frank Sinatra Drive a bit and parking where you see the Chuckwalla Loop sign on the right side. Starting here cuts off about 2 miles.
Distance: 5 miles, lollipop loop (6.25 miles for the full out-and-back route; 3 miles for the short out-and-back loop)
Elevation Gain/Loss: 300/300 feet (approximate)
Map: The City of Rancho Mirage has a trail map online, but it isn't very detailed. Still, it is difficult if not impossible to get lost in this area since views are so open and it lies within the foothills urbanized zone.
Hiking Time: About 2 to 3 hours for the full loop, depending on your personal speed.
Best Times to Hike: This hike is great year-round. In hotter months it is best to do the hike super early, so plan to arrive at the trailhead just before dawn.
Difficulty: Easy to Moderate (due to length)

Teddy bear cholla and Coachella Valley view, Rancho Mirage Survivor Loop
If you have any questions about this or any other hike listed on this blog, please leave your comment below. Also, you can tweet me @MyFitLife2Day.