Saturday, October 27, 2012

Hiking Palm Springs - Goat Trails to Murray Hill Summit

Visitors to Palm Springs rarely get a feel for the true texture of the San Jacinto and Santa Rosa Mountains. To most, the slopes that line State Highway 111 from the wind farms at San Gorgonio Pass to Palm Desert and the southern Coachella Valley are just a glorious backdrop to a weekend desert getaway. For those who would venture into them, however, these mountains unlock treasures beyond the ordinary vacation.

Murray Hill rising above the Cathedral City Starbucks along Highway 111
The hike from the Goat Trails to the top of Murray Hill in the lower Santa Rosas is a magical one. I like to start with a cup of joe from the Starbucks in Cathedral City so I can stare up at the summit and imagine myself there while I get the jolt of caffeine I'll need to help get me motivated to make the trip. Climbing more than 1,900 feet in about 3.5 miles - with a couple of ups and downs along the way that add probably another 300 feet of vertical hiking - this 7-mile out-and-back hike is fairly strenuous but still do-able in about four hours for the average hiker.

This less-than-welcoming sign marks the start of your hike to Murray Hill
The trailhead just south of the Vons Supermarket at Highway 111 and South Broadmoor Drive in Palm Springs provides ample parking. Start this hike early, as there is no tree-cover, and bring plenty of water. I recommend at least four liters. From the trailhead you will pass through a gate that says no trespassing. I assume this is meant for cars because this is a very popular trail that is listed in many guidebooks. In fact, this trailhead is especially popular because it is where all the mountain bikers access the so-called Goat Trails - a complex network of abandoned dirt roads and single-track trails that you will have to navigate on your way to the entrance to the Clara Burgess Trail, which lead to Murray Hill's summit.

View of Murray Hill from the Goat Trails, just above the twin water towers
Beyond the trailhead gate, walk up the road toward twin water towers. Near the top of the hill you will see a driveway leading into the towers on your right. Just past this, you will see a single-track trail that rises sharply up a hill. Take this and continue on it until you reach a wider trail, which is actually an abandoned dirt road. Cross this road and go straight onto another road. Continue until you reach an intersection at the bottom of the hill. Here, you will see another single-track trail that you will follow into Eagle Canyon.

Dropping into Eagle Canyon is one of my favorite parts of this hike
Continue on the Eagle Canyon trail as it takes you along the north rim of the canyon. On this trail, at about one mile, you will find a spur that leads down into Jane's Hoffbrau Oasis, a palm oasis that is a perfect destination for a shorter hike and a picnic. To reach Murray Hill, continue on. Shortly, the trail will turn sharply to the right and continue up a couple of switchbacks to the top of a hill where you will pass some serendipitous trail art before descending again into the canyon.

Take Clara Burgess Trail to Murry Hill summit
You can take that route, or instead, bypass the extra switchbacks by taking the rugged trail that continues straight along the canyon's rim until it dips down to the canyon floor. Watch your footing here as this is an un-maintained part of the trail. From here, go right and follow the floor of the canyon, scramble up two small dry waterfalls, and just after the second one look closely for a trail that leads up the south wall of the canyon. Take this route up and along the spine of a ridge until you reach a sign for the Clara Burgess Trail. This is where you will begin your ascent of Murray Hill.

Enjoy lunch with 360° views at the picnic area atop Murray Hill's summit
From here the trail is easy to follow; Just remember the way you came so you can easily find your path on the return. Here are some quick stats to help you find your way:

Trailhead: Dirt parking lot south of the Vons Supermarket at Highway 111 and South Broadmoor Drive in Palm Springs
Distance: 7 miles out-and-back
Elevation Gain/Loss: 2,200/2,200 feet
Map: The Santa Rosa and San Jacinto Mountains National Monument sells a map that includes this hike for $10. Pick one up at the visitor's center, located at 51500 State Highway 74 in Palm Desert. Also, you can put your Google skills to work to find a GPS map of the Murray Hill hike online.
Hiking Time: About 4 hours, depending on how much time you spend enjoying the sweeping views of the Coachella Valley and surrounding mountains.
Best Times to Hike: The BLM asks that you voluntarily refrain from hiking this trail to protect Bighorn Sheep breeding habitats from January 1 to June 31, although winter is probably the best time to to hike it. This means, your best bet is to hike it from late October through the end of December.
Difficulty: Moderate to Difficult

This palm oasis in Eagle Canyon means a mile or so to go to the trailhead!
For more information on this and other hikes in the desert mountains, check with the Friends of the Desert Mountains. The Friends share a headquarters with the national monument at the visitor's center listed above. Also, as always, if you have any questions please feel free to contact me directly using the comments section below. I'm also on Twitter @myfitlife2day. To read my other blogs or learn more about me, check out my splash page.

Friday, October 26, 2012

Hiking Boston Metro West - Kendal Green to Cat Rock

You may know that Boston is home to two sprawling urban wilderness sanctuaries - the Middlesex Fells and the Blue Hills. But did you know that throughout the city and in the surrounding suburbs many smaller conservation areas are to be found. Cat Rock is one of my favorites, and the best part is that it's accessible by public transit from Boston's North Station or Porter Square in Cambridge.

Hobb's Pond - the gem of Cat Rock Park
Cat Rock Park, located in Weston, Mass., is a tiny slice of preserved wilderness in the midst of suburbia. This granite-topped hill scratches up to the sky from within the suburban landscape about half a mile's walk from the Kendall Green T station.
Escape to the wilds of suburban Boston in Metro West's Cat Rock Park
A passive park, or reservation as it's called, Cat Rock features a loop trail that links it to the rest of the 80 Acre woods that surround Hobb's Pond - the park's central gem. Hobb's Pond is fed by the Cambridge Reservoir farther north and empties via Hobbs Brook to the south into the Stony Brook Reservoir, finally releasing into the Charles River by the Waltham-Newton divide. Hobb's Brook dissects the Cat Rock and 80 Acres hiking loop, so two shorter loops may be followed by sticking to the brook's east or west bank, or you can do the whole thing in just a few hours.

Dogs should be on-leash when not relaxing by your side atop Cat Rock
Cat Rock is on the west side loop. To get there directly I'd suggest taking the Fitchburg Line to Kendal Green, walking north on Church Street, taking a left onto Route 117, and then a quick right onto Drabbington Way. Trail spurs are at the end of Drabbington, on either side of the ball field. The quickest route to Cat Rock from here is taking the left trail spur. Take it into the woods and veer left in the clearing to ascend the old abandoned ski run, and then down the mushroom-clad hill that leads downhill to the west and north here and do the entire loop toward an open meadow, and Hobb's Pond.

Fells-like rock formation in northeaster section of Cat Rock Park
The trail to the right of the ball field will take you away from Cat Rock, to a footbridge where you can cross to the east side loop and into the woods. Straight ahead you will find a street exit to Lexington Street, which runs north-south and forms much of the eastern edge of the woods. Straight and to the right you will find the southern exit to Page Road, which curves east once exiting the park and also leads to Lexington Street. Continue to the north past Hobb's Pond and across the meadow and you will find the northwestern corner of the park, which is also fun to explore. There is a large rock formation similar to what you will find in the Fells.

After exploring Cat Rock Park, to return to Kendal Green either go back to the trailhead you came in on via Drabbington Way, or take Lexington south to Route 117, where you will take a right and then a left onto Church, which slopes down hill toward the station.

Here are the quick stats for Cat Rock Park:

Trailhead: Parking lot at the end of Drabbington Way in Weston, Mass.
Distance: 1 to 5 miles
Elevation Gain/Loss: approximately 300/300 feet
Map: You can obtain a map of Weston Conservation Lands for $10 from the town hall at 11 Town House Road, Weston, MA 02493, or by calling 781-786-5000.  A book with trail descriptions is also available from Weston Conservation Commission for $15. An interactive online map of Cat Rock and other conservation lands is available from the Weston Forest and Trail Association.
Hiking Time: Trails within the park extend as far as the Weston/Lincoln border in the northwestern extreme of the park - doing the main loop and the long spur up to Lincoln will garner you a fairly nice hike of about three hours. This is a great place to walk around for as little or as much time as you have.
Best Times to Hike: This hike is great year-round. Watch out for seasonal flooding.
Difficulty: Easy

If you're living in or just visiting the Boston area, I'd really recommend checking this place out. It's a lovely diversion from the fast pace of city life. And if you're close enough, it's a great spot to enjoy regular hikes without having to venture too far from home. If you're looking for more strenuous hikes in the Boston area, check out these three hikes.

To find out more about your me, check out my splash page. Follow me on Twitter @MyFitLife2Day. And check out my other blogs, MyFitLife2Day and Man of Merit.

Wednesday, October 17, 2012

Hiking Boston - Blue Hills Reservation Skyline Trail

Hiking the Blue Hills Reservation south of Boston is an experience no visitor or Beantown resident should miss. The Blue Hills, managed by the Massachusetts Department of Conservation and Recreation, encompass 7,000 acres of land with varied terrain and scenic views, making it a perfect destination for hiking. The crown jewel of the Blue Hills is the Skyline Trail - a 10-mile route that crosses over most of the park's most prominent summits.
At the Skyline Trail Head
The route I describe in this post starts on Willard Street in Quincy, travels nine miles of the Skyline Trail to the summit of Great Blue Hill, at 635 feet above sea level, then loops back around to the reservation headquarters. You will need either two cars or a friend to pick you up at the end of the trail, but this small inconvenience will make it possible for you to enjoy one of the Boston area's greatest outdoor adventures. For the two car option, leave one car at the park headquarters on Hillside Street and drive to the trailhead located at the Shea Rink parking lot on Willard Street in Quincy.

A vernal pool provides a great place to contemplate life on the Skyline Trail
The initial part of the walk is serene, with very little elevation gain. After about half a mile or less you will come to Wampatuck Road. Once you cross here you will be on a fire road, but you won't stay on it for long. Make sure you look out for the trail, which veers off to the left. From here you begin your steady ascent to the sweeping views of Boston and the greater Massachusetts Bay area that give the trail its name.

The morning sun pierces through a twisted tree on Rattlesnake Hill
The first hill you will come to is called Rattlesnake. The trail here winds up and around a placid vernal pool, its still waters perhaps belying a storied past as a romantic water hole dating back to the days when the native, pre-colonial Massachusett people would come at the end of summer to prepare for winters here. The rocky, precarious descent from Rattlesnake Hill and the subsequent climb and descent of Wampatuck Hill will give you just a taste of the scrambling you will have to do on a number of the more than 10 hills you will traverse on your journey.
The Skyline Trail hike is an up-and-down-and-up-and-down adventure!
Next you will cross Chickatawbut Road, then the trail steadily rises past the Blue Hills Reservoir and you are treated to some amazing changes in scenery. Climb steadily to a grove of young aspens before descending again to pass through some older growth oaks and maples, then up again to a grove of stumpy conifers, where you can find a nice flat rock to sit on to have a mid-morning snack.

Cut through this grove of young aspens en route to Nahanton Hill
The nourishment here is a good idea, as you will have three successive hills to climb – Nahanton, Kitchamakin, and Chickatawbut, which is topped by a fenced-in learning center with an inaccessible lookout tower, a solar panel array, and several bird houses. Once you pass this, you will make a steep descent to Randolph Road at the 3.6 mile point.

Looking northwest from the broad, clear summit of Buck Hill
Cross Randolph Road and you will began a rapid ascent of Buck Hill, which provides the broadest 360-degree views of the day, despite the fact that this is not the highest peak you will summit. Look to the northwest and on a clear day you can see all the way to Wachusett Mountain in Central Massachusetts and Mount Monadnock in Southern New Hampshire. The Boston skyline and harbor are visible to the north and east. And enjoy trying to pick out locations along the South Shore as you try to see all the way down to the Cape.

Moving on, you will descend Buck, which leads to another steep ascent. This is Tucker Hill. Once you summit Tucker, make your way down its western slope to arrive at Hillside Street, at just past 6.5 miles, where there is a picnic table situated under the shade of a large tree just in front of the ranger’s headquarters, perfect for a shaded lunch before pressing on to finish your hike.

At the ranger’s station you will find a bathroom and a source of water to refill. Make sure you drink plenty of water, because this last portion of the trail has some precarious ups and downs that will require you to have all your balance, which is aided with proper hydration.

From the headquarters take the northern branch of the trail across the scenic and quite challenging Hancock, Hemenway and Wolcott hills en route to Great Blue Hill. This is the nine-mile mark. Once here, climb the stone tower at Blue's summit and snap one last shot of Boston's skyline before continuing along the south branch trail some, which you will find some meters to the south of the tower.

View of Boston from Great Blue Hill
Before setting off on this final leg of your journey, you might want to text your pick up so he or she will be there waiting for you at the rendez-vous point on Hillside Street.

On this final spur, you climb one more major hill – Houghton. Before reaching Houghton's summit, though, you will have to climb two smaller hills, each increasing some in elevation before dropping back down into notches. Since only Houghton Hill is listed on the available maps for the Blue Hills, I personally refer to the hills leading up to and including Houghton as the Three Brothers. And Houghton is definitely the meanest of the three, with a final descent from his summit that's a steep and rocky pain!

As you are descending the east face of Houghton Hill, you will see Hillside Street below. This is where the footing gets tricky, so pay attention to the trail and don't rush things. You will be pretty tired by this point, and you don't want to make a silly mistake that will end in a twisted ankle or worse.

If you're doing this hike in the fall, winter or spring, you will be glad to know that just down the road you will find a hot cup of coffee waiting at the local Dunkin' Donuts. All said and done, you will have hiked 10-miles with an elevation gain of around 2,500 feet, and it will have taken you between five and seven hours.

Here are the quick stats for this hike:

Trailhead: At the Shea Rink parking lot on Willard Street in Quincy
Distance: 10 miles
Elevation Gain/Loss: 2,500/2,500 feet
Map: This entire area is well marked. A free PDF map is available from Blue Hills Reservation. You can also buy a hard copy of the map at the ranger's station for $2 - proceeds benefit the Trailside Museum. NOTE: There was a mistake in the most recent printing of the Blue Hills Reservation map and brochure which deletes the south branch of the Skyline Trail that returns to the ranger station via Houghton Hill. However, I have spoken with a park ranger who assures me that the full Skyline Trail is still open. Call the ranger station at 617-698-1802 if you have any questions.
Hiking Time: Depending on your pace and how many breaks you take, this hike can take from five to seven hours.
Best Times to Hike: This hike is great year-round, although take special care when hiking during rainy or snowy conditions as most of the hike involves hopping from rock to rock, and these rocks can get slippery when wet.
Difficulty: Moderate to Difficult. This hike requires a certain level of physical fitness and the ability to do some light scrambling.

Map showing the full north and south branches of the Skyline Trail
If you plan to try this trail, or have any questions, feel free to shoot me a comment below. And also, follow me on Twitter @MyFitLife2Day and check out my other blogs, MyFitLife2Day and Man of Merit. I'm also on HubPages at brianschwarz.hubpages.com.

Happy hiking!

Tuesday, October 16, 2012

Hiking Zia Pueblo - White Mesa Center Spine Loop

The gypsum and mineral-rich White Mesa belongs to Zia Pueblo but the trails here are maintained by the Bureau of Land Management. First developed for mountain biking, with its unique geographical features and historical significance, this magical place is growing in popularity among hikers - so much so that the BLM recently built a second parking lot to handle the flow, especially during the winter months when trails at higher elevations are covered with snow.

Hiking Zia Pueblo White Mesa Trails, near Ojito Wilderness, New Mexico
To reach the trailhead, travel from either Albuquerque or Santa Fe on I-25 and take Exit 242 and turn left toward Bernalillo. Follow NM 550 West for about 20 miles, then turn left on Cabezon Road. You'll notice a big white mesa in front of you, and if you reach the town of San Ysidro you've gone about two miles too far. Almost immediately Cabezon Road veers to the left. Follow the signs for Ojito Wilderness/Zia Pueblo. From the turn-off, follow the rugged dirt road about four miles where you will cross a cattle guard. Park at the lot on the left side of the road. The trail head is directly across from the parking area on the right side of the road.

A hiker heads into the painted canyon, which leads up to White Mesa
The trailhead will lead you toward the mouth of a painted canyon, colored in light hues of blue, red and green by the various minerals that flow from springs nearby. You'll also notice a huge hunk of bright white gypsum clinging to the north wall of the canyon. This is where you will encounter your first elevation gain. While it's not very high, it's a bit steep and it can be difficult to get your footing. A walking stick helps, but it's still do-able without one. But be careful!

This is your first ascent and final descent - it's challenging but do-able
Once you reach the top of the mesa you will notice you are at a clearing where it seems vehicle have been doing donuts in the white gypsum soil. Straight ahead you will see a trail map. Get your bearings and follow the points 17, 18, 19, 22, 12, 13, 15, 16, and back to 17. This may seem like gibberish, but take a look at the map pictured here and it will all make sense. At point 17 you are back at the clearing. You will descend the same way you came up - and it's a bit more precarious going down, so again, be careful.

Check out the views from the hike's high point on a solid gypsum hill
Continuing along the trail described above, you will soon pass the highest point on this hike, at 6,060 feet elevation. Take in the amazing views. You will see the famous Cabezon Mesa sticking up on the horizon like a "big head". Also, notice the Jemez Mountains to the north, the Sandia Mountains back in the direction of Albuquerque and of course the basin that forms at the edge of the mesa with the Tierra Amarilla Anticline as its dramatic backdrop.

Pay attention to these junction signs to follow the loop described - or explore!
Here is some information on the historic and geographical significance of the region, provided by the BLM:
At the western edge of White Mesa, the Tierra Amarilla Anticline forms high, narrow mesa ridges. This classic example of a plunging anticline is visited by several university field schools each year. Fossil remains of rare dinosaurs, plants, and trees from the Jurassic period are located in the Morrison Formation. Natural erosion processes have exposed the bones of huge dinosaurs and large segments of petrified trees. These fossils are approximately 150 million years old! The longest dinosaur ever recovered, Seismosaurus, was discovered only a few miles west of the bike trails area in what is now the Ojito Wilderness. Paleontologists and geologists use this great variety of life to construct geologic timelines and interpret climate changes over the earth’s history.
Tierra Amarilla Anticline provides stunning backdrop at mineral spring
From the gypsum-capped high point you will follow the Center Spine Trail that will take you along a descending ridgeline into the valley. From here, it is easy to follow the trail straight up a hill in front of you to find some fascinating payoff - an active mineral-water spring and, just off the trail to the left and up some more, a sink hole left by a spring that has long dried up. Continue on the trail, which is an old jeep road, until you reach a point where the trail heads back to the right along another ridge. This trail - at Junction 12 - will lead you back to your starting point.

Center Spine rises up the mesa as seen from a cool sink-hole along the hike
Take your time and really explore the Center Spine Loop at White Mesa Trails
This truly is an amazing hike, and I highly recommend it, especially for novice hikers or for anyone looking for a nice conditioning workout in the great outdoors. Here are the trail stats:

Trailhead: On Cabezon Road, four miles from NM 550 just south of San Ysidro. From the turn-off, follow signs for Zia Pueblo/Ojito Wilderness down the rugged dirt road for about four miles where you will cross a cattle guard. Park at the lot on the left side of the road; The trail head is directly across from the parking area on the right side of the road. NOTE: There is a second parking lot a little further down which is where most of the mountain bikers who ride these trails begin their rides.
Distance: 4.5 miles
Elevation Gain/Loss: Estimated 300 feet/300 feet (twice)
Map: A free map is available from BLM here. This entire area is also well marked and mapped at most if not all of the junctions.
Hiking Time: Depending on your pace and how much you spend wandering around, this hike can take about two or three hours. But take your time - there is much to explore, and it's pretty hard to get lost since it is so open and well marked.
Best Times to Hike: This hike can be brutal in the summer but any other time of the year it can be hiked any time of the day. Just make sure you wear a hat and apply sunscreen regularly, even in the winter.
Difficulty: Easy. With the exception of the first ascent I mention where you might need to use your hands for balance, there is no climbing or scrambling. But you can do this hike at a good pace and will get an excellent cardio workout.

Making my way along the final portion of trail back to Junction 17
Please let me know if you try this hike, and if you're planning on checking it out feel free to leave me a comment below with any questions you may have. I'm always here to help! Also, follow me on Twitter @MyFitLife2Day, read my other blogs Man of Merit and MyFitLife2Day, and check out my Hubs at the popular site for writers, HubPages!

Monday, October 15, 2012

Hiking Albuquerque Sandia Wilderness - Embudito Canyon to South Summit

When most people think of hiking Albuquerque the famed La Luz Trail to the Tram comes to mind. But the vast Sandia Wilderness is a veritable hiking mecca with many incredible trails to be explored. Personally, my favorite is not the La Luz Trail but the trail that winds up Embudito Canyon to Sandia's South Summit.
View of Sandia's South Summit from the Embudito Trail
This 12-mile out-and-back hike is a very do-able day hike that is strenuous enough to give you an enormous sense of accomplishment. Whether you live in Albuquerque or are just visiting, you will want to check out the amazing hike that is the Embudito Trail. The Embudito Trail is more scenic than La Luz, in my opinion, with more expansive and widely varied views. I also love that the Embudito Trail isn't full of lazy tourists at the top - there is no road, no tram, and no ski lift. You really have to do some work to get there, and the people you meet along the way share the same passion for the true adventure of hiking.

The sun-drenched lower portion of Embudito Trail, Mt. Taylor in distance
The key to doing this trail - or any hike for that matter - is to be prepared. Depending on your pace, this hike can take between 6 and 10 hours to complete. Take plenty of water (4 to 6 liters is recommended), and plan ahead with lunch and snacks to keep up your energy throughout the day. Plan to set out from the trailhead as early as possible - check for sunset times and plan for 10 hours on the trail, even if you may be able to do it quicker. Also, this hike can be brutal in the summer since about two-thirds of the trail is under direct sunlight. Make sure you wear a hat, bring along sunscreen and re-apply frequently.

Sandia's South Summit in view - to the right of the massive rock formation
This is a moderate to strenuous hike. You will go through three major phases in the six-mile hike to the summit. The first two miles follow the scenic north wall of Embudito Canyon. The initial ascent is sun-drenched and the trail is lined with juniper, cholla and prickly pear cactus. At the two-mile mark the trail descends into an upper branch of the canyon, crossing over to the canyon's south wall. The second two miles are tree-covered. Here you will enjoy the shade of aspens and pines, including the stately Ponderosa.

Sweeping views from Sandia's South Mountain, Manzanos in the distance
Just before you reach the four-mile point the Embudito Trail arrives at Oso Pass. Here, the Three Gun Spring Trail joins the Embudito from the south and the Whitewash Trail comes in from the southwest. Turn left at Oso Pass and just beyond the junction you will find a great place to sit and have lunch. You'll need the energy to fuel your final ascent to Sandia's South Summit!

Don't celebrate too quickly - this is a false summit!
The last couple of miles on the Embudito Trail are quite strenuous. You will feel the burn as the trail rises steadily above the lower peaks of the southern Sandia mountains. Look up to your left and you will see a sheer rock wall - beyond that is the South Summit. Continue heading south and east on the trail for some time until you are nearing the crest. As you make your way diagonally across a steep slope covered in scrub oak, just before you reach the crest, keep your eyes peeled for a small cairn on the left side of the trail that makes a sort of switchback up the mountain's west face toward the summit. Turn left here and continue on. En route from here you will experience two false summits. Keep following the trail until it ends where you reach your goal - Sandia's South Summit.

The approach to Sandia's South Summit along a narrow, rocky path
Should you be up for the challenge of trekking up the Embudito Trail to Sandia's South Summit, here are some of the important details to help get you on your way:

Trailhead: Located at the end of Trailhead Road in Albuquerque, take Tramway Boulevard to Montgomery Boulevard and go east toward the mountains. Turn left on Greenwood Hills Road and then right onto Trailhead Road. The Emubdito Trailhead is at the north end of the parking lot at the end of Trailhead Road.
Distance: Some guide books say this trail is 11 miles out-and-back, but I say it's 12 miles
Elevation Gain/Loss: 3,400/3,400 feet (1,036/1,036 meters)
Map: A must-have map for hiking Albuquerque's Sandia Mountains is this GPS Powered Trail Map from Dharma Maps. A free map is also available from the Sandia Ranger District (11776 New Mexico 337, Tijeras, NM 87059).
Hiking Time: Depending on your pace, this hike can take between 6 and 10 hours to complete. Take plenty of water (4 to 6 liters recommended), lunch and snacks to keep up your energy.
Best Times to Hike: Plan to leave the trailhead as early as possible - check for sunset times and plan on 10 hours on the trail even if you may be able to do it quicker. This hike can be brutal in the summer since about 2/3 of the trail is under direct sunlight.
Difficulty: Moderate to Strenuous. The six miles to the summit isn't the hard part; Coming down is tough on the legs, so make sure you're in good shape for this one.

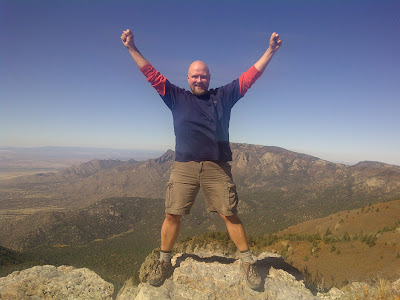
Celebrating the victory of reaching Sandia's South Summit
Once you reach Sandia's South Summit, celebrate your victory, have another snack, and prepare yourself for the descent. The six miles to the summit isn't the hard part; Coming down is tough on the legs, so make sure you're in good shape for this one. Pace yourself. Though you will want to hurry down, be careful not to slip and fall - the trail has some loose, pebbly soils and it is easy to make a misstep when you are already tired and longing to plop into the seat of your car. And don't forget to save water for that final two miles back down the canyon - that's when you will need it the most!

This is a unique hike in that it is nearly 100 percent within designated wilderness and a National Forest, yet you almost constantly experience views that remind you of the fragility of our world's protected spaces. I highly recommend this scenic hike the next time you're in Albuquerque. In fact, I would even say this hike is worth planning a special trip to the Duke City. Please leave me a comment below, and if you have any additional questions as you plan this hike, feel free to ask!

Happy hiking!

Learn more about the author at about.me/brian.schwarz. Follow HikeyHikey blogger Brian Schwarz on Twitter @MyFitLife2Day. Check out his other blogs, Man of Merit and MyFitLife2Day. And make sure to stop by Brian's Hubs on the popular writing site HubPages.